

Creating custom images for your website used to take weeks and cost thousands of dollars. Your design team had to spend days giving instructions to agencies, reviewing drafts, and handling revisions. Now, AI image generation has changed all of that.
Companies that use AI image tools say they create images 70% faster and cut costs by 60%. This saves real money in your IT budget and helps you get your web projects live faster. With reliable web hosting that supports your growing image library, you can maximize these benefits. If you still use stock photos or pay expensive design agencies, you are missing out on a big advantage.
Understanding AI Image Generation for Web Design
What Makes AI Image Generators Different from Stock Photos
Stock photo websites only have what’s already been made. You’ll have to scroll through thousands of regular images and hope to find one close to your vision. Even paying for premium stock photo licenses (sometimes between $2000 and $5,000 each year) still gives you the same images everyone else uses.
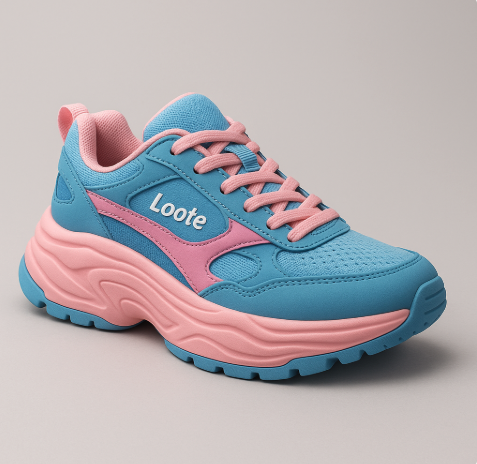
AI image generators are different. You just say what you need, and the tool creates it for you. If you want a photo of your unique product in a setting that doesn’t exist, you can make it. Need illustrations in your own brand colors? That’s easy too. The big difference is that you get unlimited custom images, instead of searching limited libraries.
This saves your team many hours of searching. Even better, now your images match your brand instead of you trying to make your brand fit whatever stock photos you can find. You likely know that it can be slightly more complicated at first; you’ll need to learn the right structure and how to prompt correctly. But once you have the process down, it’s a great asset for web design.
How AI Image Generation Works
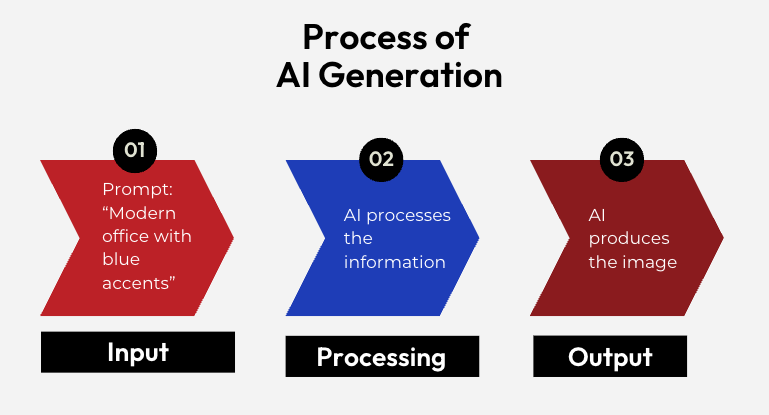
AI image generators use a technology known as “text-to-image processing.” You write a description of what you want. This description is known as a prompt. Then, the AI creates an image based on that prompt. The AI has learned from millions of images matched with text, so it understands how words and pictures are linked.
It’s like having a designer who gets exactly what you want. You can say, “modern office space with blue accents and natural lighting,” and in seconds, you will see several options. The AI uses what it learned to make something new, based on your words.
Understanding this helps you control quality. If you know how the system reads your prompts, you can write better descriptions and get better images. This lets your team get results that look professional and fit your needs every time.
Key Platforms for Professional Web Design
Adobe Firefly: Firefly works with Adobe Creative Suite tools you may already use. It also can be used smoothly with Photoshop and Illustrator for final edits.
Midjourney: Midjourney delivers high artistic quality. It runs on Discord, which can feel a bit different from what most users are used to, but the amazing images make it worth learning.
DALL-E 3: Dall-e 3 is best for images that need text included, like infographics. It’s part of OpenAI, so the backend helps it understand complicated prompts well.
Stable Diffusion: Stable diffusion is open source, so you can run it on your computers and keep all your data private. No monthly fee, just pay for your tech setup. Great for companies with strict rules about privacy.
How to Create AI Images: Step-by-Step Implementation
Phase 1: Setting Up Your AI Image Generation Workflow (30 days)
First, choose your platform based on what your team needs. If your designers primarily use Adobe, pick Firefly. If you want top-quality images for marketing, try Midjourney. Don’t worry if you’re unsure; you can always test other platforms later.
Plan for this setup phase to take about one month. Spend the first week picking your platform and creating accounts. The second week is for testing connections with your current tools. Use weeks three and four to train your team and write simple process guides.
Phase 2: Writing Good Prompts for Better Results
How to Structure Prompts:
Start with what’s in the image (person, product, office scene).
Add style words (modern, simple, professional).
Include details about picture quality and shape (high quality, white background, horizontal).
Example: “Executive headshot, modern professional style, white background, high resolution” is better than just saying “picture of a business person.”
Staying Consistent with Brand Templates:
Add color codes: “use brand colors #C52228 and #2245C4.”
Say your industry: “healthcare technology setting.”
List your audience: “for business decision-makers.”
Include your style: “clean, modern, professional.”
You can save these templates for everyone, so images always match your brand.
Quality Control Words:
Always use “professional,” “high-resolution,” “web-optimized.”
If it’s for business, add “clean,” “modern,” “business-appropriate.”
For product images: “detailed,” “well-lit,” “on white background.”
For people: “diverse,” “realistic,” “engaging.”
Mistakes to Avoid:
There are some issues with AI image prompting that marketers have been learning over the years. Here are a few we’ve seen frequently:
Writing prompts that are too long or confusing. For example, “Professional woman in modern office using laptop with coffee cup on desk near window with city view” is too much detail.
Better: Focus on the main parts. “Professional woman using laptop in modern office, natural lighting.”
Don’t use too many style words in one prompt.
Avoid giving instructions that don’t mix, like saying “vintage modern” or “colorful monochrome.”
Phase 3: Optimizing Images for the Web
Choosing the correct file type helps your website load fast. Here’s a quick guide:
Use WebP for most images, as it’s smaller and looks better than JPEG.
Use PNG only for logos or pictures that require transparent backgrounds.
Use JPEG for email pictures since WebP may not work everywhere.
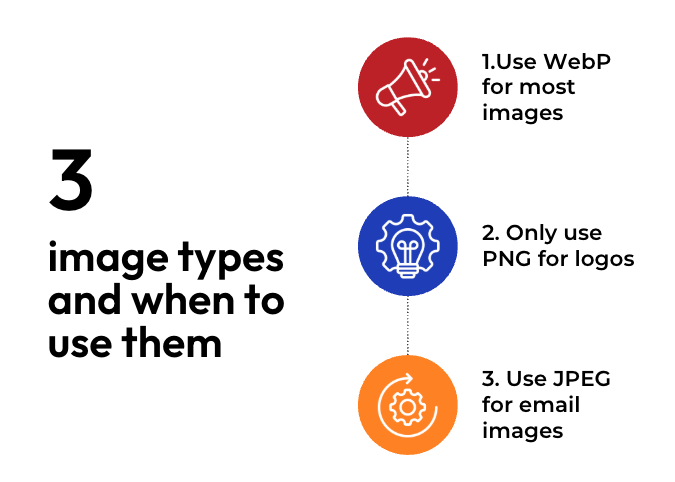
Image dimensions play a big role in keeping file sizes small. For large webpage visuals like hero images, stick to 1920×1080 pixels. Blog posts display well at 1200×630 pixels, while smaller elements such as icons work best at 400×300 pixels. Oversized images only add unnecessary weight and can slow your site down.
Compress images to save space. Tools like TinyPNG or ImageOptim help you make images smaller without losing quality. Keep hero images under 200KB, and other images under 100KB if possible. Test to see what still looks good. Usually, 85% quality is just as good as 100%, but it loads much faster.
Use a fast-loading system, called a Content Delivery Network (CDN), to make images load quickly everywhere. A hosting service, like InMotion Hosting, can do this. You only need to upload it once, and users get quick access no matter where they are.
Phase 4: Bringing AI Images into Your Workflow and Scaling Up
Once you can make quality images, your next challenge is to use AI to help your team work faster, not slower. Smart connections and clear steps turn AI image creation into a powerful part of your business.
Start by connecting your AI tool to your website builder (like WordPress) using plugins or special links (APIs). This eliminates time-wasting uploads and downloads. You’ll want to set clear rules for image names, like “product-name-side-date.webp,” so anyone can understand them. Add tags and picture descriptions (alt text) right away, so you don’t forget what each image is later.
Batch creation helps you save time and stay consistent. Instead of designing images one by one, use AI to generate multiple versions at once. For example, if you need 20 variations of a product photo, start with a strong prompt and adjust small details for each version; you’ll have them ready in minutes. When creating campaign assets, design a main image first, then apply that same style across social media, email, and other channels. This approach keeps your visuals cohesive, professional, and ready faster.
Version control keeps mistakes from becoming costly. Use a simple system like “v1” for drafts, “v2” for edits, and “approved” for final files. Keep drafts in one folder and finished images in another to avoid confusion. For major projects, note which versions you used so you can easily track results and return to what worked best.
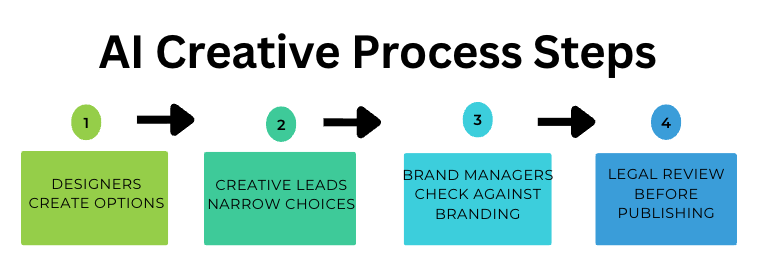
Teamwork keeps your creative process running smoothly. Set up clear review steps: designers create options, creative leads narrow the choices, and brand managers ensure everything aligns with brand standards. If needed, add a legal review before publishing. Use shared folders with labels like “In Progress,” “Needs Review,” and “Approved” to stay organized. Regular check-ins help you spot what’s working and fix issues quickly, keeping projects on track and your team moving faster.
This kind of structured collaboration lays the foundation for scaling creative work at the enterprise level. The same habits that keep small teams organized (clear roles, version control, and consistent check-ins) become essential when governance and quality control are at stake.
Enterprise Implementation: Governance and Quality Control
Using AI images without rules quickly leads to problems. One off-brand or risky image can harm your reputation or even cause legal trouble. With simple controls, AI helps you keep high standards as you create more and more images.
Creating Approval Workflows
Think of reviews as safeguards, not obstacles. They protect your brand and keep projects moving. Use tiered reviews based on risk: designers draft options, creative leads narrow choices, brand managers confirm style and messaging, and legal steps in when needed. Clear roles and deadlines prevent bottlenecks.
Add simple brand checks at each stage: Are the colors correct? Does it look like us? Does it follow our style? These gates speed up reviews and cut down on rejections.
Not every image needs the same scrutiny. An internal slide may only need a glance, while website graphics require full brand checks, and ads often need legal review. A simple chart outlining review levels helps avoid over-checking low-risk work or missing steps on high-risk projects.
Team Training and Adoption Strategies
AI tools only deliver value when teams know how to use them. Without training, results suffer and frustration grows. Run hands-on workshops that show how to write strong prompts, use real projects as examples, and let the team practice. Share brand-approved templates so confidence grows and adoption feels natural.
Encourage different teams to create. Product managers make mockups, marketing builds graphics, sales designs slides, but always within approved templates and processes. This balance keeps creativity high while protecting brand consistency.
Track meaningful results to build buy-in. Show how AI reduces turnaround from days to hours, lowers costs, and cuts revisions. Share these wins regularly. When teams see their own productivity improve, even skeptics become supporters.
Risk Management Framework
There are some real legal risks with AI images. Here’s how you can protect your company by following some rules.
Don’t ask for images of real people unless you own the rights. Never use brand names, logos, or famous characters in your prompts.
Share a list of what’s banned. Prevention is always better (and cheaper) than getting in trouble later.
Maintain high brand quality by checking published images monthly. Pick random images from your website or social media. Are colors slipping? Is the style still matching your guide? If you see changes, update templates and tell your team.
Set image quality rules. For important website pictures, set a minimum size and a maximum file size. Different uses, like social or print, may have special needs.
Share simple guides everyone can bookmark.
Review a sample each week. Trust will grow as quality stays high, and you won’t need to check every image in the future.
ROI Analysis and Business Impact Measurement
Cost Savings Calculation
Less Design Time:
Before: Custom images took 2-3 days each.
Now: AI images take 2-3 minutes each.
If design time costs $150 an hour, that saves $3,000 or more per image. For 20 images a month, that’s $60,000 saved in time each month.
Lower Subscription and License Fees:
Stock photo sites: $5,000-$15,000 each year.
AI tools: $500-$1,500 each year.
You save $4,000-$13,500, plus get all the variations you want.
Better Than Paying Agencies:
Hiring an agency: Each custom image can cost $500 to $5,000.
Freelancers: $200 to $1,000 per image.
AI: Unlimited images for around $50-$100 a month.
Skipping one agency job pays for years of AI tools.
Future-Proofing Your AI Image Strategy
Next-Generation Features Coming Soon
New features are on the way. Video generation will let you make short, AI-powered clips and prepare videos alongside images for use in your work.
Soon, you’ll be able to change parts of your image directly instead of making endless variations. Want a new color or background? You can adjust it without starting over.
AI will also learn your brand style better. Upload your brand guidelines once, and the AI will make images that always match your look, even without long prompts.
Preparing for New Rules and Laws
The EU and other places are starting to regulate AI images. You may soon need to say if an image is AI-made or get permission in some cases. Document your process now, and it will make rule changes easier in the future.
Keep an eye on copyright laws. As the rules for AI-generated content change, adjust your practices as needed. Join industry groups and follow updates so you’re not caught by surprise.
Get involved in creating standards for AI images. The more you contribute, the better prepared you’ll be when new guidelines are announced.
Getting Started with AI Image Generation
Here’s a simple action plan for your first 30 days:
Week one: Pick your AI platform and set up your team accounts.
Week two: Train your team on writing good prompts and basic platform use.
Week three: Try AI images on one real project.
Week four: Write down your steps and see how much time and quality you gained.
Begin with a small project to prove the value. Pick a landing page that needs better images. Create all the images with AI. Measure how much faster, cheaper, and better it is compared to your old way. Show your results to help get support for using AI on more projects.
Learn faster by joining groups on Discord or Reddit related to your AI platform. Take short online courses on how to write strong prompts. Follow creative AI artists to see new techniques. You will improve much faster by seeing what others have done.
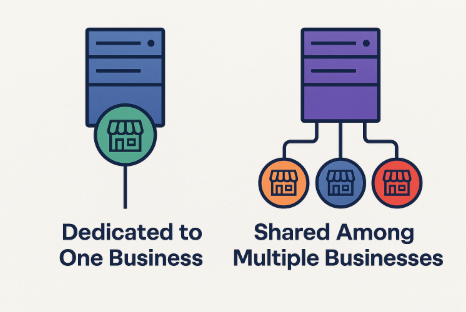
Make sure your web hosting is ready to handle more images. As you generate more visuals, you’ll need better storage and fast delivery tools. InMotion Hosting’s dedicated server hosting ensures your AI-generated images load lightning-fast, giving you the performance foundation to support unlimited creative content. Even with great images, slow loading will hurt your site unless your tech keeps up.
Getting started with AI image generation is about progress, not perfection. Begin small, track results, and build confidence step by step. With the right training, tools, and hosting foundation, you’ll have faster workflows, stronger visuals, and a creative process that scales with your business.