
Your WordPress membership content could be circulating on public forums for free right now, and you wouldn’t know it until your revenue starts to drop.
Many site owners rely on simple password protection, which does nothing to stop a member from sharing direct download links with non-paying users.
The good news is that you don’t need to build custom security systems or hire a developer. The right combination of WordPress plugins and a few straightforward settings can dramatically reduce the risk of your content being stolen or redistributed.
In this guide, I will show you exactly how to protect your site and keep your premium content exclusive to paying members. 🔐

TL;DR: Prevent membership content theft by following these tips:
Restrict content to logged-in members and enforce access rules with MemberPress.
Put key material behind a paywall and protect downloads with MemberPress Downloads or Easy Digital Downloads.
Use content dripping to limit mass copying and improve retention.
Watermark images and limit your RSS feed to excerpts to reduce scraping.
Monitor the web with Google Alerts and Copyscape to catch unauthorized use early.
Back everything up with copyright notices and a Creative Commons license to give yourself legal standing if you need to act.
Why Content Protection Is Important for Membership Sites
Content is the biggest asset for any membership site — it’s what people pay or sign up for. Whether that’s online courses, premium tutorials, downloadable resources, or a members-only community, your content is the reason people stick around.
I’ve seen firsthand how quickly unprotected content can spread. Once someone shares your premium material outside your site, it becomes nearly impossible to remove it from the internet.
That’s why protecting your content from the start is far easier than trying to recover it later.
The good news is that a few smart strategies can go a long way. Here’s why content protection should be a priority for your membership site:
💰 Protect your revenue — If your premium content is freely available elsewhere, then potential members have little reason to pay for access. For example, a leaked online course can cost you dozens of lost subscriptions.
🌟 Maintain the value of your membership — If a paying member can find your premium content with a quick Google search, they will cancel. Keeping content genuinely exclusive is what makes the membership fee feel worth paying month after month.
🛑 Stop content scrapers and copycats — As your membership site grows and your content gains visibility, it becomes a more attractive target for content scrapers and copycats. Getting protections in place early means you are not scrambling to recover later.
⏱️ Protect the time and effort you invest — Building a quality online course or resource library can take hundreds of hours. If that material leaks and circulates for free, you lose the ability to charge for it, effectively giving away all that work with nothing in return.
🕹️ Control how your content is shared — Even well-meaning members may share content without realizing it’s a problem. Clear restrictions and licensing help set expectations from the start.
There are also legal and ethical considerations to keep in mind. Unauthorized use of your content may violate copyright law, and having protections in place gives you a stronger foundation if you ever need to take action against someone who misuses your work.
Here is an overview of the topics I will cover in this post:
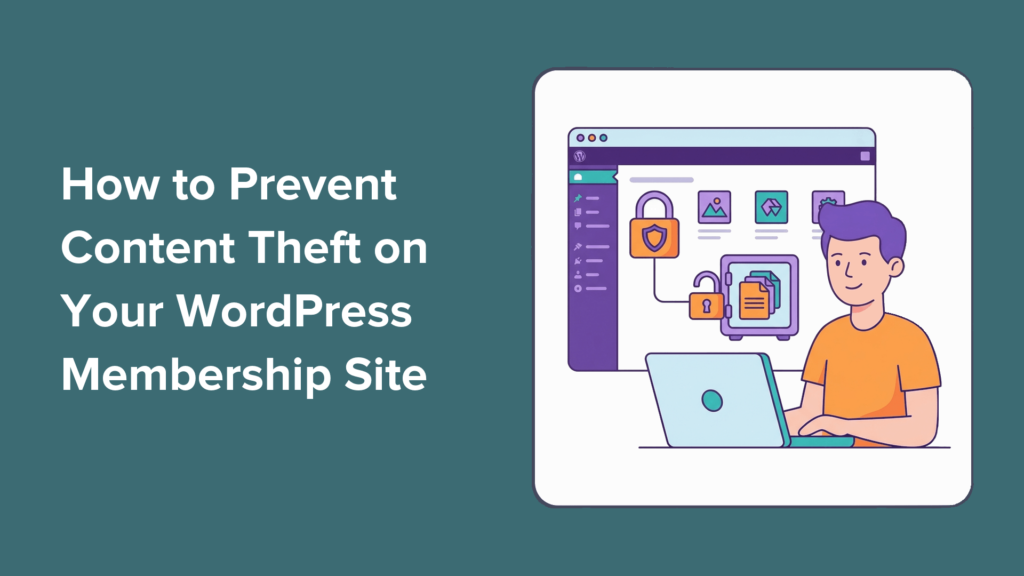
Tip 1. Restricting Content to Logged-In Members
One of the most effective ways to protect your membership content is to make sure only registered members can access it. This prevents casual visitors, bots, and most scrapers from viewing your gated content in the first place.
Think of it like a lock on the door. If someone can’t even see your premium content, then they can’t copy it, download it, or share it without your permission.
For this, we recommend using MemberPress. It’s one of the best and most popular membership plugins available for WordPress, and it gives you powerful tools to control exactly who can access what on your site.
At WPBeginner, we actually use MemberPress to run our video membership site. It’s been working really well for us, and you can learn more about it in our complete MemberPress review.

To do this, you’ll need MemberPress installed and activated on your site. You can see ourbeginner’s guide to installing a WordPress plugin for a step-by-step guide.
💡 Note: MemberPress is a premium plugin. Make sure to create an account on the MemberPress website, download the zip file, and upload it to your WordPress website. Then, you’ll verify your license key.
Once the plugin is active, go to MemberPress » Rules in your WordPress dashboard to start creating access rules. This is where you control which content is visible to which membership levels.
With MemberPress, you can restrict pages, posts, videos, and downloadable resources so that only registered members can access them.

For example, you might restrict all posts in a specific category to paying members. You could also limit access to individual pages, such as member-only forums, resource libraries, or private communities.
This flexibility means you can tailor your content restrictions to match exactly how your membership site is structured.
Even better, you can set up recurring payments so that members are billed automatically and maintain access to your premium content.
For a full walkthrough, see our guide on how to restrict content to registered users in WordPress.
Tip 2. Putting Premium Content Behind a Paywall
One of the most effective ways to protect your membership content is to place it behind a paywall.
A paywall adds a financial barrier, which means your most valuable content stays exclusive to the members who are actually paying for it.

MemberPress makes it easy to set up a paywall in WordPress without any coding. Once it’s installed and activated, you can create membership tiers and assign specific content to each one.
Expert Tip: If you choose the MemberPress Launch plan, keep in mind there is a 4.9% transaction fee on every sale. You’ll need to upgrade to a Growth or Scale plan to remove these fees as your site grows.
For example, you can set things up so that:
Free visitors can read basic blog posts.
Paid members can access premium tutorials.
Higher-tier members can unlock advanced courses or exclusive resources.
This kind of tiered access is a great way to protect your best content while still offering something valuable to everyone who visits your site.

Plus, MemberPress offers subscriptions with a free trial to encourage visitors to try your premium content before committing.
For the full setup steps, see our guide on how to create a paywall in WordPress.
Restricing Access to Downloadable Files
If you are already using MemberPress, the easiest option is the MemberPress Downloads addon, which restricts direct file links without needing a separate plugin.
If you are not using MemberPress, or if you sell digital files directly, then Easy Digital Downloads (EDD) is a strong standalone alternative.
EDD is the best WordPress download manager plugin on the market. It has built-in tools for restricting access to downloads, making it a great option if you sell member-only digital files like eBooks, templates, or software.

For more insights into the plugin, see our detailed Easy Digital Downloads review. And for step-by-step instructions, see our guide on how to sell digital downloads in WordPress.
Tip 3. Setting Up Content Dripping
Even with access restrictions and a paywall in place, some members may try to download or copy large amounts of your material all at once.
Content dripping is a powerful feature that helps prevent this. Instead of giving members instant access to your entire content library when they sign up, it lets you release content gradually over time.
Here are two major benefits for membership site owners:
It reduces the risk of mass downloading or scraping — When only a small portion of your material is available at any given time, there’s simply less for bad actors to grab at once.
It keeps members engaged longer — Gradual releases give members a reason to keep coming back, which improves retention and reduces cancellations.
MemberPress has a built-in content dripping feature that’s straightforward to configure. Once you’ve set up your membership levels and content restrictions, you can assign a drip schedule to any piece of content.
One of the best use cases for this feature is online courses.
For example, you might release a new online course lesson every seven days after a member signs up, rather than giving them access to everything on day one.

You can also set up content expiry alongside dripping.
This means that after a certain period, older material becomes unavailable again, adding another layer of protection to your library.

Content dripping with expiration is also helpful for coaching programs or cohort-based learning, where students progress through the material on a fixed schedule.
For a full walkthrough of how to set this up, see our guide on how to automatically drip content in your WordPress site.
Tip 4. Protecting Images with Watermarks
If your membership site includes original images, graphics, or visual content, watermarking is one of the best ways to protect them.
A watermark is a visible logo, text, or symbol overlaid on the image that identifies it as yours, even if someone downloads and shares it elsewhere.
This is especially important for membership sites that rely heavily on visual content, like photography communities, design resources, or illustrated course materials. Even if someone manages to save one of your images, your watermark travels with it.
For watermarking images in WordPress, I recommend using Envira Gallery. It’s the best WordPress gallery plugin that includes a built-in watermarking feature.
Envira Gallery lets you set a watermark image — typically your logo or site name — and automatically applies it to your gallery images. This means you don’t have to manually watermark each image one by one, which saves a lot of time if you have a large content library.

For a complete step-by-step walkthrough, see our guide on how to automatically add a watermark to images in WordPress.
🧑💻 Pro Tip: Along with watermarking your images, you can disable right-click or use scripts that make it harder to copy images directly from the page.
These won’t stop determined users (since anyone can still take a screenshot of their device), but they are a great way to discourage casual copying and saving.
See our guide on how to disable right-click on WordPress images for more details.
Your RSS feed is a useful feature that lets readers follow your content through feed readers and email services. However, it can also make it easy for scrapers to automatically pull your full posts and republish them elsewhere, often without you even knowing.
The good news is that WordPress makes it easy to customize your RSS feeds to limit what appears in them. By showing only a summary of each post instead of the full content, you can significantly reduce the risk of your content being scraped and republished automatically.
To make this change, go to Settings » Reading in your WordPress dashboard.
Look for the option that says ‘For each post in a feed, include’ and you’ll see two choices: ‘Full text’ and ‘Excerpt.’

Simply select the ‘Excerpt’ option and then click ‘Save Changes’ at the bottom of the page.
From this point on, your RSS feed will only show a short excerpt of each post instead of the full content.
This means that even if a scraper is pulling from your RSS feed, they’ll only get a preview, not the full article. Anyone who wants to read the complete post will need to visit your site directly.
🛑 Important: Keep in mind that while this stops automated RSS syndication, advanced bots can still scrape the live HTML directly from your web pages. That’s why pairing this strategy with a membership plugin and strong security is so important.
For detailed step-by-step instructions, see our guide on how to customize your WordPress RSS feeds.
Tip 6. Monitoring the Web for Unauthorized Content Usage
Protecting your content doesn’t stop after adding safeguards. It’s also important to check whether your material is being used elsewhere without permission.
I recommend setting up a simple monitoring routine, even if it’s just a quick check once a month. Catching unauthorized use early makes it much easier to address before it spreads further.
One of the easiest ways to check for copied content is to search for it directly on Google Search. Take a unique sentence or phrase from one of your posts, place it in quotation marks, and paste it into the search bar.
For example, a nutrition membership site could look for “The secret to our specific recipe is blending the sugar first”. This forces Google to search for that exact match.

If Google shows results from other websites using that exact text, there’s a good chance your content has been copied. Start by checking your most valuable or high-traffic pages, since those are the most likely to be targeted.
For a more hands-off approach, you can set up Google Alerts to automatically notify you when new content matching your chosen keywords appears online. This means you don’t have to manually search every time — Google does the monitoring for you.
To get started, visit Google Alerts and enter a unique phrase from your site.

You can choose how often you want to receive alerts and have them delivered straight to your inbox. Setting up alerts for your site name, course titles, or other distinctive phrases is a great way to stay on top of potential misuse.
For a full list of free Google tools that can help you manage and grow your WordPress site, see our guide on free Google tools every WordPress blogger should use.
Tip 7. Using a Plagiarism Checker to Search for Copies
Google Alerts is a great starting point for monitoring your content. But for more thorough checks, a dedicated plagiarism detection tool can help you find duplicate copies of your pages across the web.
One of the most trusted options is Copyscape. It’s beginner-friendly, easy to use, and doesn’t require any technical setup. It’s a good first option for membership site owners.
To use it, simply visit the Copyscape website and paste the URL of the page you want to check. The tool will scan the web for matching content and show you any pages that may have copied your material.

Running checks on your most important pages every few months is a simple way to spot unauthorized use early.
If you want more comprehensive protection, Copyscape Premium offers automatic monitoring that scans the web for copies of your content and alerts you when a match is found. This is especially helpful for larger membership sites with lots of content to protect.
For a broader look at your options, see our guide on the best plagiarism checker tools.
Tip 8: Setting Up Copyright Notices
Once you have the right access controls and monitoring in place, a copyright notice is an important final layer. It signals to visitors and potential scrapers that your content belongs to you and is protected by law.
While a copyright notice doesn’t technically prevent someone from copying your work, it removes any excuse that they “didn’t know.” It also gives you a stronger legal footing if you ever need to take action against someone who uses your content without permission.
Applying for Copyright
By law, your content is automatically copyrighted the moment you create and publish it.
However, for the strongest level of protection in the United States, you can officially register your work with the United States Copyright Office. This gives you the enhanced legal right to pursue damages if someone infringes on your content.
If you’d prefer a guided process, services like CorpNet can help you file a copyright registration without needing a lawyer. These are especially helpful if legal paperwork feels overwhelming.
A basic copyright notice typically looks something like this:
© 2026 [Your Site Name]. All rights reserved. Unauthorized use and/or duplication of this material without express and written permission is strictly prohibited.
Here’s what ours looks like:

You can customize this depending on your site type.
For example, an online course site might add: Course materials may not be reproduced, distributed, or transmitted in any form without prior written permission.
Adding the Copyright Notice to Your Site
The most common place to display your copyright notice is in your site’s footer, so it appears on every page.
You can add it using your theme’s footer widget area or site editor. Simply place the copyright text in a Text, Paragraph, or Shortcode block in the footer and save your changes.
This ensures your notice is visible to every visitor — and every scraper — who lands on your site.

For details, see our guide on how to edit your footer in WordPress.
Making Your Copyright Dynamic
WPCode makes it easy to add dynamic copyright dates and custom scripts to your site’s footer without editing your theme files.
We have thoroughly tested WPCode to see how it compares to other solutions. To read more about our experience, see our complete WPCode review.

To get started, you’ll need WPCode installed on your WordPress site. If you haven’t done this before, see our beginner’s guide on how to install a WordPress plugin.
💡 Note: You can use the free version of WPCode. That said, upgrading to WPCode Pro unlocks additional features like code scheduling, revision history, and more.
Once the plugin is active, you can create a custom code snippet to automatically update your copyright date and add it to your footer using a shortcode.

For the full steps, see our tutorial on how to add a dynamic copyright date in your WordPress footer.
Tip 9. Getting Creative Commons Licenses
A Creative Commons license is a great way to clearly communicate how others can and can’t use your content.
Instead of a simple “all rights reserved” notice, it gives you more control by spelling out exactly what’s allowed. This can actually discourage misuse more effectively than a standard copyright notice alone.
Creative Commons offers several license types, each with different levels of restriction. Here’s a quick overview to help you choose the right one for your membership site:
For most membership sites, CC BY-NC-ND is the safest choice. It allows your content to be referenced or shared in its original form, but prevents anyone from profiting from it or changing it without your permission.
Getting Your License Badge
Once you’ve chosen your license type, head to the Creative Commons website to get your official license badge.
Simply select your license preferences, and Creative Commons will generate a small badge image along with a snippet of HTML code for you to copy.
Here’s what it might look like:
<img alt=”Creative Commons License” style=”border-width:0″
src=”https://i.creativecommons.org/l/by-nc-nd/4.0/88×31.png” />
</a>
<br />
This work is licensed under a
<a rel=”license” href=”https://creativecommons.org/licenses/by-nc-nd/4.0/”>
Creative Commons Attribution-NonCommercial-NoDerivatives 4.0 International License</a>.
This badge acts as a clear, recognizable signal to visitors that your content is protected under specific terms. It’s a small addition that carries a lot of weight.
Placing the License Prominently on Your Site
Just like your copyright notice, your Creative Commons license should appear somewhere visible on every page. The footer is the most common location.
To add it, go to Appearance » Widgets in your WordPress dashboard. Then, find your footer widget area, add a ‘Text’ or ‘Custom HTML’ widget, and paste the HTML snippet provided by Creative Commons.

If you’re using a block theme with Full Site Editing, go to Appearance » Editor instead.
From there, open your ‘Footer’ template and add a ‘Custom HTML’ block, then paste in the same snippet.

Don’t forget to save your changes when you’re done.
🧑💻 Pro Tip: You may also want to include your licensing terms in your Terms of Service so visitors clearly understand how your content can be shared or referenced.
Bonus Tip: How to Improve Your WordPress Site Security
Content protection works best when your overall site security is strong. If your WordPress site has vulnerabilities, then attackers may be able to bypass membership restrictions or scrape your content more easily.
That’s why it’s important to combine content protection with basic security practices. Here are a few key steps you can take:
Install a security plugin — A good security plugin monitors your site for threats and blocks suspicious activity.
Enable two-factor authentication (2FA) — This adds an extra layer of protection to your login process, making it much harder for unauthorized users to access your site.
Keep WordPress, themes, and plugins updated — Outdated software is one of the most common ways hackers gain access to websites.
Use strong passwords and limit login attempts — Weak passwords make it easier for bots to break into your site using brute-force attacks (where automated scripts guess your password over and over until they get in).
Set up regular backups — If something goes wrong, a recent backup allows you to quickly restore your site without losing content or member data.
For a full walkthrough, see our complete WordPress security guide.
Frequently Asked Questions About Protecting Membership Content
Here are some of the most common questions our readers ask about protecting their membership content:
What are some common tools for content protection?
There are several reliable tools you can use to protect your membership content in WordPress. For restricting access, MemberPress is one of the most popular options — it lets you create paywalls, set up access rules, and drip content to members.
For image protection, Envira Gallery includes built-in watermarking. To monitor for copied content, Google Alerts and Copyscape are both widely used and easy to set up. For overall site security, installing a dedicated security plugin adds an important extra layer of protection.
How effective are copyright notices in preventing theft?
Copyright notices are a useful first line of defense, but they work best when combined with other protection methods. A copyright notice signals to visitors that your content is legally protected and removes any “I didn’t know” excuse if someone copies your work.
However, a notice alone won’t stop a determined scraper — pairing it with access restrictions, a paywall, and active monitoring gives you much stronger protection overall.
What should I do if I find my content on another site without permission?
If you find your content being used without permission, the first step is to contact the website owner directly and request that they remove it.
If that doesn’t work, you can file a DMCA (Digital Millennium Copyright Act) takedown notice with their web host, which is an official legal request that requires them to remove the stolen content.
For repeated or serious cases of infringement, consulting a lawyer who specializes in copyright law is a good next step.
Can I stop people from taking screenshots of my content?
No, there is no reliable way to prevent screenshots or people taking photos of their screens with a different device. Content protection is about making theft harder and establishing legal ownership, rather than making it 100% impossible.
Next Steps to Grow Your Membership Site
Content protection gives you the peace of mind to stop worrying about theft and start focusing on your members. The most successful membership sites aren’t just libraries of content. They are active communities where the value lies in the interaction and expertise you provide.
Here are some helpful resources to take your membership site to the next level:
If you liked this article, then please subscribe to our YouTube Channel for WordPress video tutorials. You can also find us on Twitter and Facebook.